
How to Install Wire Shelving: Step-by-Step Guide Without Tools
How to Install Wire Shelving: A Tool-Free Guide by Utility Basics
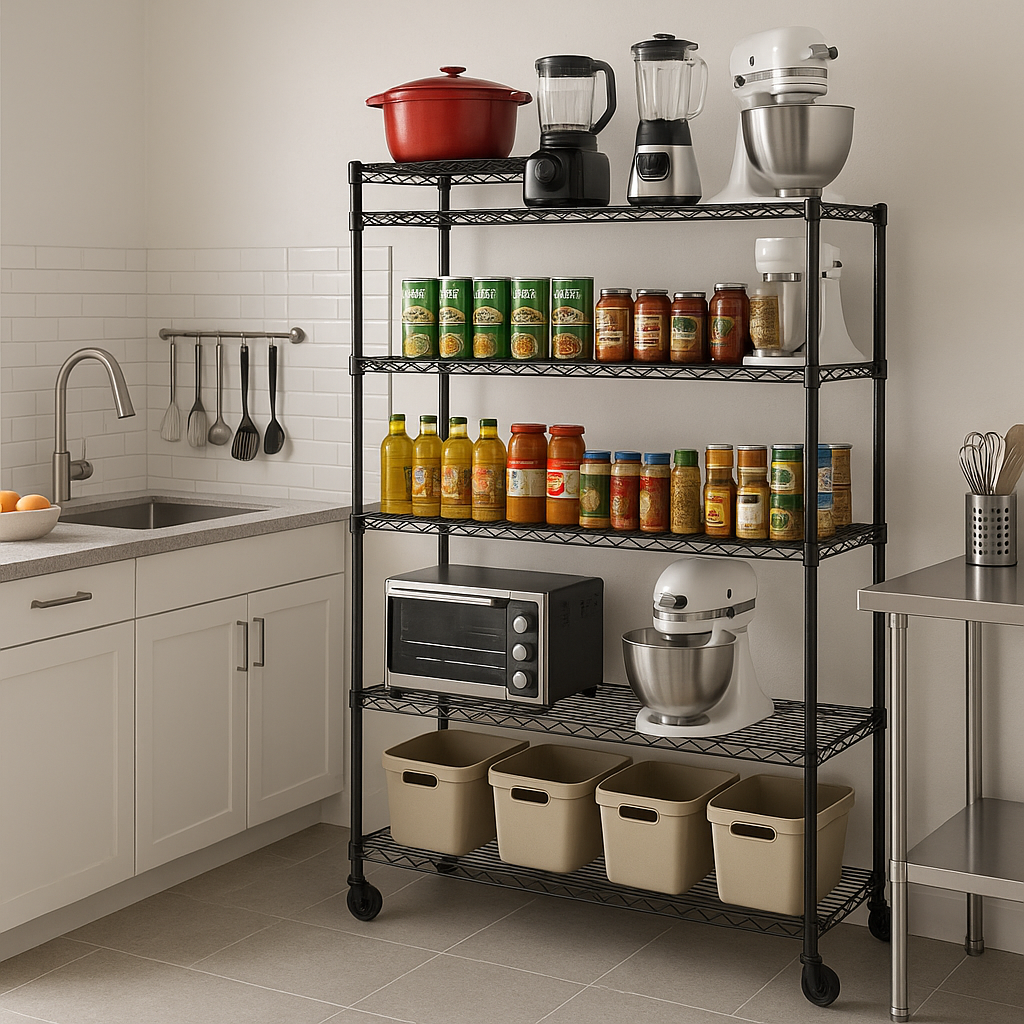
Clutter taking over your space? Learn how to install wire shelving with the Utility Basics wire shelving unit—a tool-free, NSF-certified storage solution that sets up in under 10 minutes. Perfect for kitchens, garages, warehouses, or offices, this step-by-step guide makes wire shelving installation quick and professional.
What You Need to Install Wire Shelving
No tools required! Your Utility Basics shelving kit includes everything for easy assembly:
- 4 or 5 Wire Shelves
- 4 Lower Poles
- 4 Upper Poles
- 4 Connectors
- 4 Leveling Feet or Caster Wheels
- 34–48 Plastic Clips
- 4 Caps
Tip: Spread out all parts on a clean floor before starting your wire shelving installation.
Step-by-Step: How to Install Wire Shelving

Follow these simple steps to master how to install wire shelving with ease and stability.
Step 1: Select Your Base – Stationary or Mobile
- Stationary: Screw in leveling feet for a fixed setup.
- Mobile: Snap in caster wheels for mobility.
- Pro Tip: Hand-tighten feet or wheels to ensure a secure base.
Step 2: Set the Bottom Shelf Height
- Use one pair of plastic clips per pole.
- Choose your desired height (poles are marked every inch).
- Snap clips onto each lower pole, with the arrow pointing up and “TOP” facing upward.
- Slide the bottom shelf over the clips until it locks firmly.
Note: Check that all shelf corners sit evenly on the clips to prevent wobbling during wire shelving installation.
Step 3: Attach Lower Poles and Middle Shelves
- Insert lower poles through the bottom shelf’s corners.
- Stand the unit upright.
- Repeat the clip and shelf process for additional shelves (e.g., second or third).
Step 4: Connect Upper Poles
- Screw upper poles into lower poles using the provided connectors.
- Add remaining shelves at your chosen heights.
- Pro Tip: Install shelves from the bottom up for better balance.
Step 5: Secure and Finalize
- Tap each shelf gently into place with your palms (or a rubber mallet, if available).
- Press plastic end caps onto the top of each pole.
- Adjust leveling feet or lock caster wheels to stabilize the unit.
Safety Tips for Wire Shelving Installation
Ensure a safe wire shelving installation with these manufacturer guidelines:
- Weight Limits:
Stationary (leveling feet): 600 lbs per shelf.
Mobile (wheels): 120 lbs per shelf. - Mobility: Move wheeled units only on smooth surfaces.
- Inspection: Examine parts for cracks or wear before assembling.
- Modifications: Do not drill or alter the shelving.
Need help? Reach our U.S.-based support at 307-429-2157 or support@utilitybasics.com.
Why Utility Basics Excels in Wire Shelving Installation
Here’s why Utility Basics makes how to install wire shelving effortless:
|
Feature |
Benefit |
|---|---|
|
Tool-Free Assembly |
Simplifies wire shelving installation with no tools needed. |
|
Adjustable Clips |
Customize shelf spacing in 1-inch increments. |
|
Stationary or Mobile |
Suits fixed or rolling storage needs. |
|
Durable & Certified |
NSF-rated, Taiwan-crafted, up to 3,000 lbs total capacity. |
FAQs: How to Install Wire Shelving
1. How to install wire shelving without drilling?
You can install freestanding units like Utility Basics racks without drilling using plastic clips and pole connectors. No wall mounts or tools are needed.
2. How to install wire shelving in pantry?
Choose adjustable units with tier spacing that fits tall pantry items. Install the lowest shelf first, then work upward based on your storage needs.
3. How to install wire shelving in closet?
Measure closet width and height first. For walk-ins, place higher shelves for seasonal storage. For reach-ins, space shelves evenly with easy access in mind.
4. How to install wire shelving in garage?
Use heavy-duty models with casters or leveling feet. Install on clean, level concrete. Secure spacing based on item height (paint cans, bins, tools).
5. How to install wire shelving on drywall? (if not freestanding)
For wall-mounted options, use wall anchors rated for at least 50 lbs per bracket. However, Utility Basics shelving does not require wall mounting.
6. How to install wire shelving with brackets?
Brackets are typically used for wall-mounted shelves. Ensure you're hitting wall studs or using heavy-duty drywall anchors. This is not needed for Utility Basics racks.
7. How to install wire shelving upside down?
This is not recommended. Shelves are engineered with specific weight-bearing orientations. Always follow the upright installation process.
Conclusion: Master How to Install Wire Shelving
With Utility Basics, learning how to install wire shelving is fast and stress-free. Whether organizing a restaurant, decluttering a garage, or optimizing warehouse inventory, our NSF-certified wire shelving offers durability and flexibility without screws or tools. Start your tool-free wire shelving installation today and reclaim your space!
Ready to get started? Visit Utility Basics or email support@utilitybasics.com for more information.